Traveling gives you unforgettable memories—and what better way to relive them than by turning your raw clips into polished, cinematic travel videos? Whether you’re backpacking through Europe, road-tripping across the country, or enjoying a relaxing beach getaway, Movavi Video Editor makes it incredibly easy to upgrade your footage and bring those experiences to life.
In this blog, we’ll break down exactly how to level up your travel videos using Movavi Video Editor, from mood-matching filters to fun animated stickers. No prior editing experience? No problem. Movavi is beginner-friendly but packed with powerful features that even pros appreciate.
Why Use Movavi Video Editor for Travel Videos?
Before jumping into the how-to’s, it’s worth knowing why Movavi is ideal for travel content.
- User-friendly interface: Designed for beginners but powerful enough for advanced users.
- Speed and performance: Quick rendering and real-time previews keep your workflow smooth.
- Creative tools: From filters to transitions and stabilization, the tools you need are just a click away.
Whether you’re editing a quick Instagram reel or a 10-minute YouTube vlog, Movavi has your back.
Step-by-Step Guide to Upgrading Your Travel Videos
Here’s how to take your clips from “just okay” to totally scroll-stopping.
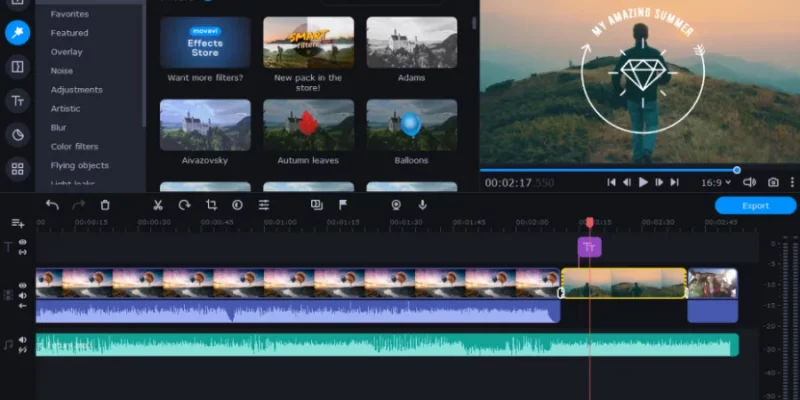
1. Use Filters to Match the Mood
Travel isn’t one-size-fits-all—and neither are your videos. A beach vacation calls for warm, sunny tones. A rainy-day city stroll? Maybe a cooler, moody vibe.
How to apply filters in Movavi:
- Open your project and import your footage.
- Go to the Filters tab on the left-hand panel.
- Browse through categories like “Artistic,” “Retro,” or “Vignettes.”
- Drag and drop your chosen filter onto the clip.
Pro tip: Don’t overdo it. Stick to one or two filters to maintain consistency. A coherent look across your video makes it more cinematic and enjoyable to watch.
2. Add Music and Transitions for Smooth Storytelling
Music and transitions can turn a chaotic montage into a smooth, emotional journey.
Adding background music:
- Click on the Media Bin and import your music, or explore Movavi’s built-in music library.
- Drag the audio to the timeline below your clips.
- Adjust volume and sync it to match key moments like scene changes or action peaks.
Using transitions:
- Navigate to the Transitions tab.
- Choose from styles like “Fade,” “Zoom,” or “Glitch.”
Drag your chosen transition between clips to create smooth flow.
Pro tip: Match the rhythm of your cuts and transitions to the beat of your music—it’s subtle, but it adds major polish.
3. Cut Out Shaky Footage Using Video Stabilization
No tripod? No problem. Movavi’s stabilization feature lets you clean up wobbly shots from handheld footage or bumpy adventures.
How to stabilize a clip:
- Select the shaky clip on your timeline.
- Click More Tools > Stabilization in the side panel.
- Adjust the intensity and preview the result.
- Click Apply to smooth out the video.
Pro tip: Use this especially for walking shots, moving vehicles, or zoomed-in scenes where hand movement is more noticeable.
4. Throw in Titles and Animated Stickers for Fun Moments
Want to add a playful or informative touch to your travel vlog? Titles and animated stickers do the trick.
Adding titles:
- Click the Titles tab.
- Choose from presets like “Basic,” “Stylized,” or “Speech Bubble.”
- Drag your selection onto the timeline and type your text.
Use titles to:
- Introduce a new location
- Share fun facts
- Add humour with captions
Adding animated stickers:
- Open the Stickers tab.
- Browse through icons, emojis, or travel-themed graphics.
- Drag and drop onto any part of the video.
Pro tip: Use stickers sparingly—one or two per scene max. Too many can distract from your actual footage.
Bonus Tips to Polish Your Travel Videos
- Trim the Fat
Don’t keep every single second of footage. Stick to clips that serve a purpose—show a view, a moment, or a reaction.
- Keep It Short and Sweet
Unless it’s a full travel documentary, aim to keep videos between 2–4 minutes for social media or under 10 minutes for YouTube.
- Use Voiceover for Personal Touch
Movavi allows you to record voiceovers directly. Use it to add context or storytelling when the visuals aren’t enough.
Conclusion
You don’t need fancy gear or advanced editing skills to make your travel videos pop—you just need the right tools. Movavi Video Editor brings together simplicity and power, letting you turn raw moments into something worth rewatching (and sharing).
So go ahead—capture the sunsets, the food, the funny fails, and the quiet moments. Then bring it all together with Movavi and make your next travel video your best one yet.
For more such tips, visit Atnook.
FAQs


Comments